

Installing a CAT5 network cable in a ceiling can significantly enhance your home or office network infrastructure. As a trusted CAT5 Network Cable supplier, I've witnessed firsthand the benefits of a well - installed network cable. In this blog, I'll guide you through the process of installing a CAT5 network cable in a ceiling, sharing tips and best practices along the way.
Planning the Installation
Before you start the actual installation, careful planning is crucial. First, determine the areas where you need network connectivity. Walk through your space and identify the rooms or workstations that require a wired network connection. Consider future expansion as well; it's better to install extra cable lengths in case you need to add more devices later.
Next, measure the distance from the network source (usually a router or a network switch) to each of the target locations. CAT5 cables have a maximum recommended length of about 100 meters (328 feet) to maintain optimal signal quality. If your distances exceed this limit, you may need to install a network repeater or consider using a different cable type, such as the CAT6 UTP Lan Cable which offers better performance over longer distances.
Once you have the measurements, create a layout plan. Sketch a rough diagram of your ceiling and mark the starting point (network source), the target locations, and the proposed cable routes. Try to avoid running the cables near sources of interference such as electrical wires, fluorescent lights, or large metal objects. Electrical interference can degrade the network signal and cause connectivity issues.
Gathering the Necessary Tools and Materials
To install a CAT5 network cable in a ceiling, you'll need the following tools and materials:
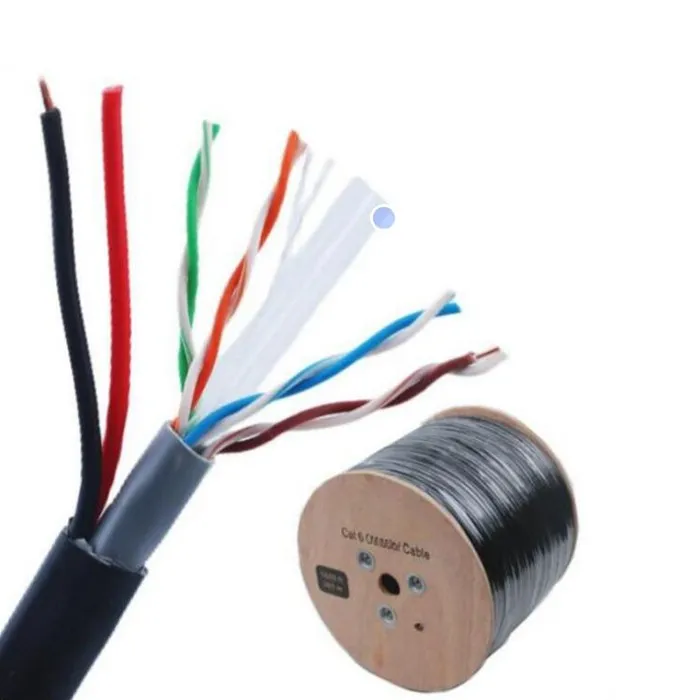
- CAT5 Network Cable: Purchase high - quality cables from a reliable supplier. We offer 305M Network Cable which provides a long - length solution for your installation needs.
- Cable Tester: This tool is essential to verify the integrity of the cable after installation. It can detect any breaks, shorts, or other issues in the cable.
- Fish Tape or Wire: Used to pull the cable through the ceiling. Fish tape is a flexible metal tape that can be threaded through the ceiling joists and cavities.
- Cable Staples or Clips: These are used to secure the cable along the ceiling joists or walls.
- Ethernet Connectors (RJ45): You'll need to terminate the ends of the cable with RJ45 connectors to connect to network devices.
- Crimping Tool: This tool is used to attach the RJ45 connectors to the cable.
- Ladder: To access the ceiling safely.
Preparing the Ceiling
Before you start pulling the cable, you need to prepare the ceiling. If your ceiling is accessible through an attic, make sure it's safe to enter. Wear appropriate safety gear such as a hard hat, gloves, and safety glasses. Clear any debris or obstacles in the attic to create a safe working environment.
If you don't have access to an attic, you may need to cut small holes in the ceiling to insert the fish tape or cable. Use a drywall saw to make clean, precise cuts. Mark the locations of the holes on the ceiling according to your layout plan.
Pulling the Cable
Once the ceiling is prepared, it's time to start pulling the cable. Begin by inserting the fish tape into the starting hole near the network source. Guide the fish tape through the ceiling joists and cavities towards the target location. You may need to use a flashlight to see the path clearly.
When the fish tape reaches the target hole, attach the CAT5 cable to the end of the fish tape using a cable tie or a similar fastener. Then, slowly pull the fish tape back through the ceiling, bringing the cable with it. As you pull the cable, make sure it doesn't get snagged on any objects in the ceiling.
If you encounter any obstacles, try to maneuver the fish tape around them. You may need to use a longer fish tape or a different route if the initial path is blocked.
Securing the Cable
After the cable is pulled through the ceiling, it's important to secure it properly. Use cable staples or clips to attach the cable to the ceiling joists or walls. Make sure the staples or clips are not too tight, as this can damage the cable. Leave some slack in the cable at each end to allow for easy termination and future adjustments.
Space the staples or clips about 2 - 3 feet apart to keep the cable in place. Avoid running the cable parallel to electrical wires for more than a few feet. If you need to cross electrical wires, do so at a 90 - degree angle to minimize interference.
Terminating the Cable
Once the cable is secured, it's time to terminate the ends with RJ45 connectors. First, strip about 1 - 1.5 inches of the outer jacket from the end of the cable using a cable stripper. Be careful not to damage the individual wires inside.
Next, arrange the wires according to the T568B or T568A wiring standard. The T568B standard is more commonly used in North America, while the T568A standard is used in some other regions. Make sure the wires are straight and neatly arranged before inserting them into the RJ45 connector.
Use a crimping tool to attach the RJ45 connector to the cable. Place the connector in the crimping tool and squeeze firmly until you hear a click. This ensures that the connector is properly attached to the cable.
Repeat the termination process for the other end of the cable.
Testing the Cable
After terminating the cable, it's essential to test it to ensure proper connectivity. Use a cable tester to check for continuity, shorts, and other issues. Connect the cable tester to both ends of the cable and follow the instructions provided with the tester.
If the cable passes the test, you can connect it to your network devices. Plug one end of the cable into the router or network switch and the other end into the network interface of the target device, such as a computer or a printer.
Troubleshooting
If the cable fails the test, there may be several issues. Check the termination of the RJ45 connectors. Make sure the wires are properly inserted and crimped. If necessary, re - terminate the connectors.
Inspect the cable for any visible damage, such as cuts or breaks. If you find a damaged section, you may need to replace the cable or splice it using a cable splicing kit.
Also, check for interference from nearby electrical sources. Move the cable away from electrical wires or other sources of interference and retest the cable.

Conclusion
Installing a CAT5 network cable in a ceiling can be a challenging but rewarding project. By following the steps outlined in this blog, you can ensure a successful installation and enjoy a reliable wired network connection.
As a CAT5 Network Cable supplier, we offer a wide range of high - quality cables, including CAT6 UTP Network Cable, to meet your network needs. If you have any questions or need assistance with your network cable installation, or if you're interested in purchasing our products, feel free to reach out to us for a procurement discussion. We're here to help you build a robust and efficient network infrastructure.
References
- "Network Cabling Installation Guide" - Industry standard publication on network cable installation best practices.
- "Ethernet Cabling Standards" - Documentation on the T568A and T568B wiring standards.